How to Visually Identify Apple Mac Pro 2006 2008 2010-2012
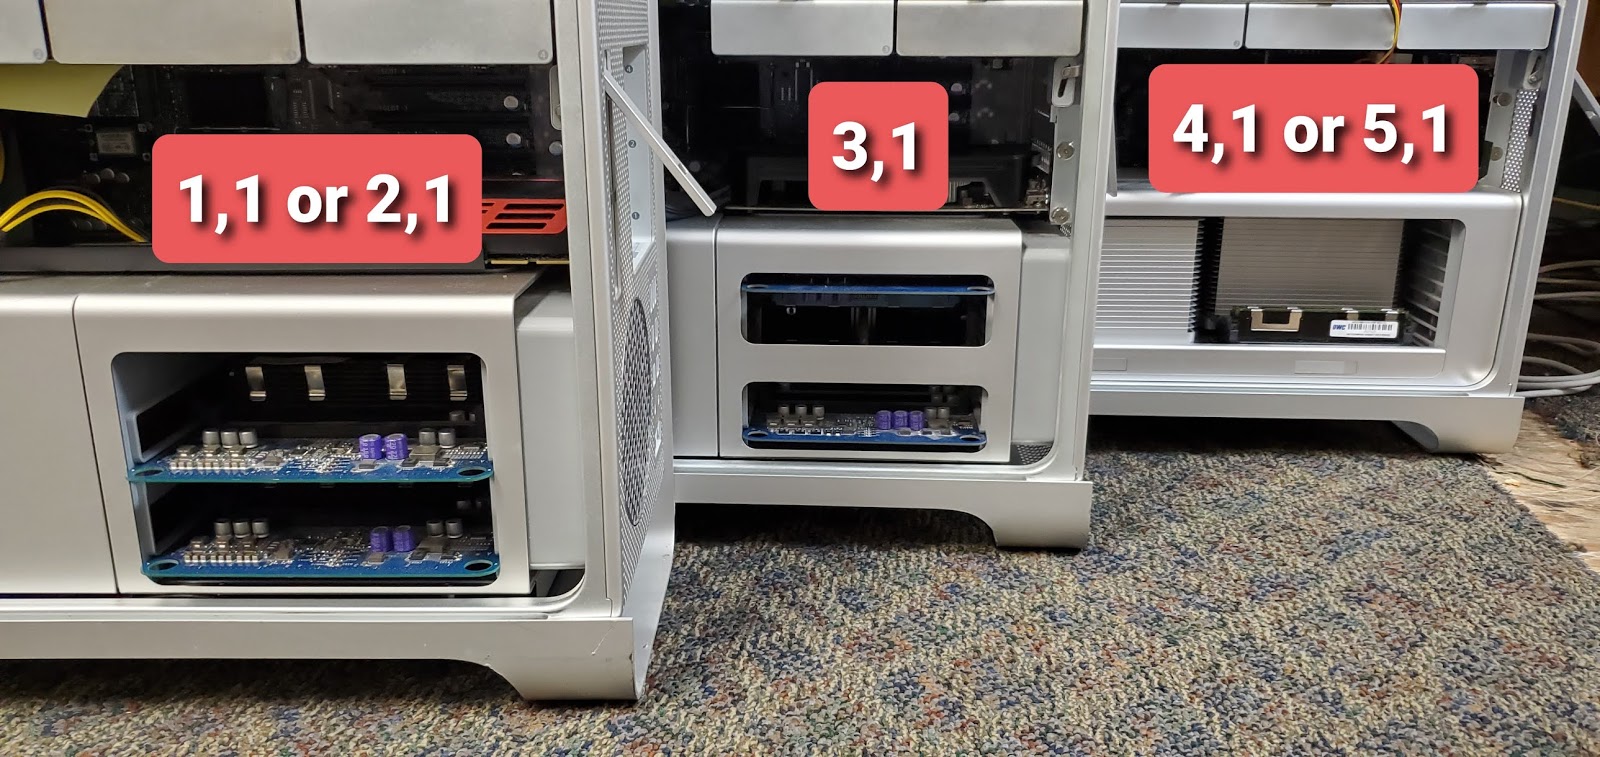
Mac Pro 1,1 and 2,1 (2006-2007)
Mac Pro 3,1 (2008)
Mac Pro 4,1 and 5,1 (2009 -2012)
Check Out the YouTube Channel and Subscribe if you want more info on any thing Tech related!!

2 X 800 FW ports Square 4,1 5,1

Closer look at the differences between the 1,1 or 2,1 and the 3,1 if you notice the Memory boards on the 1,1 / 2,1 are both facing the same way and memory is loaded on the top. On the 3,1 the top board is facing down and the bottom board is facing up.

1,1 / 2,1 will Max out at El Captain and you must use a modified version to get it installed. "Piker-Alpha bootloader" or an image from @Greg Hrutkay over at his YouTube channel Hrutkay Mods.
3,1 can go up to Catalina with DosDude1's installer, But remember the Xeon processors lack some of the instructions sets of the 4,1 and 5,1 like SSE4.2 and Native APFS support which makes them a bit more difficult to get things working properly. DosDude1 has work around for all of this baked in to his Post installer but just remember these are a work around. As well there is a flash for APFS on the 3,1 want to know more?
http://www.cesgeekbook.com/2020/06/opencore-mac-pro-2008-31-mojave.html
4,1 / 5,1 Also can run up to Catalina and Mac OS (BS) Big Sir beta with OpenCore spoofing the ID or Catalina as of writing this with DosDude1's installer I am sure he will get something put together for Mac OS "BS".